In this article will set up a continuous integration pipeline for a .NET Core web application with automated deployment to an FTP server.
For an introduction to Continuous integration see: Link
Note: Continuous Integration/CI/Continuous Deployment/CD are used interchangeably
1. Introduction
Gitlab is not only a great tool for managing your source code repositories but also offers powerful built-in continuous integration.
With Gitlab you can compose a script for a pipeline to automatically build, test and deploy (or redeploy!) your application each time you commit. A pipeline is a set of instructions in an order that we define.
As described in my article here, using continuous integration reduces both the introduction of errors into your build and the need for human intervention in deploying your app.
2. Getting Started
You will need a codebase hosted on Gitlab.
You can also mirror your code repositories from Github, which is useful if you want to only leverage Gitlab for CI but still do the bulk of your source control work on GitHub.
3. How does GitLab CI/CD works
All you need to get started with GitLab CI/CD is to create a plain text file called gitlab-ci.yml in the branch of your repository where you want to run your pipeline.
gitlab-ci.ym will contain a script defining our CI strategy.
On every commit/push to your repo, a tool built into GitLab called the GitLab Runner will execute your pipeline.
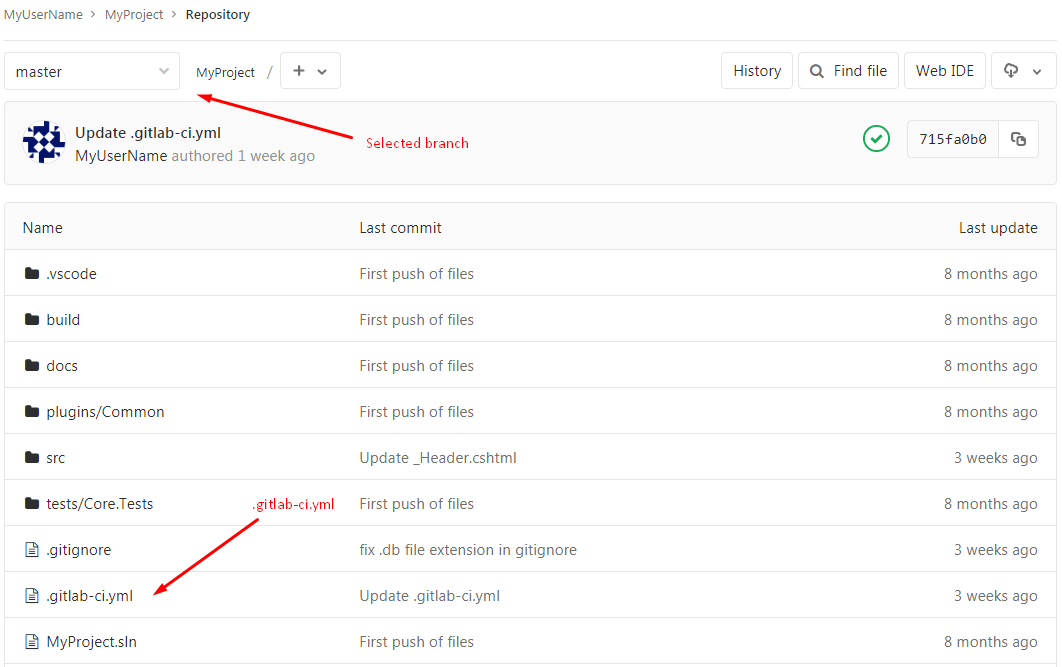
In your gitlab-ci.ym file, you can define various stages which are blocks of code containing shell scripts to run tests, cache dependencies, publish your application, zip files and specify where to deploy.
Caching dependencies
GitLab CI/CD provides a caching mechanism that can be used to save time when your jobs are running. Caching is about speeding up the time a job is executed by reusing the same content of a previous job. It can be particularly useful when you are developing software that depends on other libraries which are fetched via the internet during build time.
4. Make .gitlab-ci.yml file
Add a new file to your root branch. Name it .gitlab-ci.yml.
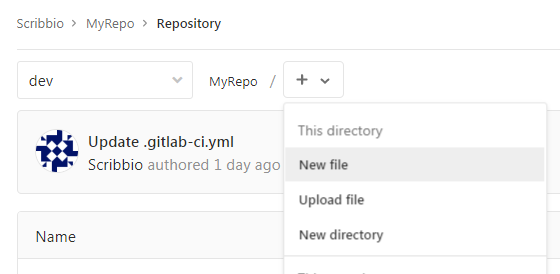
yml
The .yml extension often known as .yaml is a data-representation language like .json or .xml. It uses a plain text file to organise data in a human-readable format with Python-style indentation to indicate nesting, as such it is arguably visually easier to look at. It also supports comments where .json does not. Consequently, many consider it a better format for when the target audience for your data is human but .json triumphs when a machine is reading it.
File extensions do not have any bearing or impact on the content of the file. You can hold yaml content in files named with any extension: .yml, .yaml or indeed anything else.
A cheat sheet and full specification are available at the official site.[1]
5. Editing your .gitlab-ci.yml
We now edit the the .gitlab-ci.yml file. The final code will look something like this:
Note: gitlab-ci.yml comments start with #
image: microsoft/dotnet:latest

stages:
    - build
    - test
    - deploy

variables:
    publishdir: "bin/release/"

build:
    stage: build
    script:
        - "dotnet build"
    artifacts:
        paths:
            - "bin/"
        expire_in: 1 week

test:
    stage: test
    script:
        - "dotnet test"
        - echo "testing"

deploy:
    stage: deploy
    variables:
        deploy_path: "src/App/"
    only:
        - dev
    artifacts:
        paths:
            - src/App/bin/release
        expire_in: 1 week
    script:
    # cd to where csproj is
    - cd $deploy_path
    # publish the files - this will generate the publish files in bin/release
    - dotnet publish -c release
    # install zip and lftp
    - apt-get update -qq && apt-get install -y -qq zip lftp
    # cd to bin
    - cd bin
    # zip release, name zip CreativelyCode.zip
    - mkdir prep
    - zip -r CreativelyCode release
    # upload file to ftp
    - lftp -e "set ssl:verify-certificate no; lpwd; open $FTP_HOST; user $FTP_USERNAME $FTP_PASSWORD; put -O /files/ CreativelyCode.zip; bye"
Let's break this code down into steps.
i. Specify a Docker image to use for the job.
image: microsoft/dotnet:latest
Docker
Gitlab can use and works best with Docker.
Docker is a cool tool that can encapsulate your environment into a container separate from your infrastructure (in this case, Gitlab).
An image is a read-only template with instructions for creating a Docker container. A container is a runnable instance of an image and contains a virtual operating system with everything you need to compile and run your software without the need to directly manage server hardware and configuration. With this command, we are telling GitLab to load and instantiate a container with all the required assets to run .NET.
The advantage of Docker is the ability to embed an application into a virtual container that can run on any machine seamlessly. Available for Linux and Windows applications, "containerized software" will always work in the same standardized way, regardless of the environment.
An overview can be found here.
ii. Define stages
Although you can define any numbers of stages, in this example we will make a straightforward pipeline with a build stage, test stage and deployment stage.
stages:
    - build
    - test
    - deploy
iii. Type up the “build” block of code.
This stage will build the solution, ensuring that is indeed buildable!
build:
    stage: build
    script:
        - "dotnet build"
iv. Now for the Test stage.
This stage will execute our solution’s tests, (skip this step if you don’t have any configured).
test:
    stage: test
    script:
        - "dotnet test"
v. Deploy stage
We will add the following commands :
deploy:
    stage: deploy
    variables:
        deploy_path: "src/App/"
    only:
        - dev
    artifacts:
        paths:
            - src/App/bin/release
        expire_in: 1 week
    script:
    # cd to where csproj is
    - cd $deploy_path
    # publish the files - this will generate the publish files in bin/release
    - dotnet publish -c release
    # install zip and lftp
    - apt-get update -qq && apt-get install -y -qq zip lftp
    # cd to bin
    - cd bin
    # zip release, name zip CreativelyCode.zip
    - mkdir prep
    - zip -r CreativelyCode release
    # upload file to ftp
    - lftp -e "set ssl:verify-certificate no; lpwd; open $FTP_HOST; user $FTP_USERNAME $FTP_PASSWORD; put -O /files/ MyProject.zip; bye"
Only will ensure that the job runs only on the specified root. This avoids the generation of artifacts for feature branches.
We are temporarily installing the zip and lftp utilities to compress our published application and upload it to an FTP server.
The lftp put command takes one file from the local directory and uploads it to server.
Artifacts is an interesting Gitlab feature.
A stage may generate libraries and files which are used to deploy and run the application. By using the artifacts key word, we can persist those files.
This is achieved by defining a property pointing to the path where the output files are found. Gitlab will make it available from stage to stage.
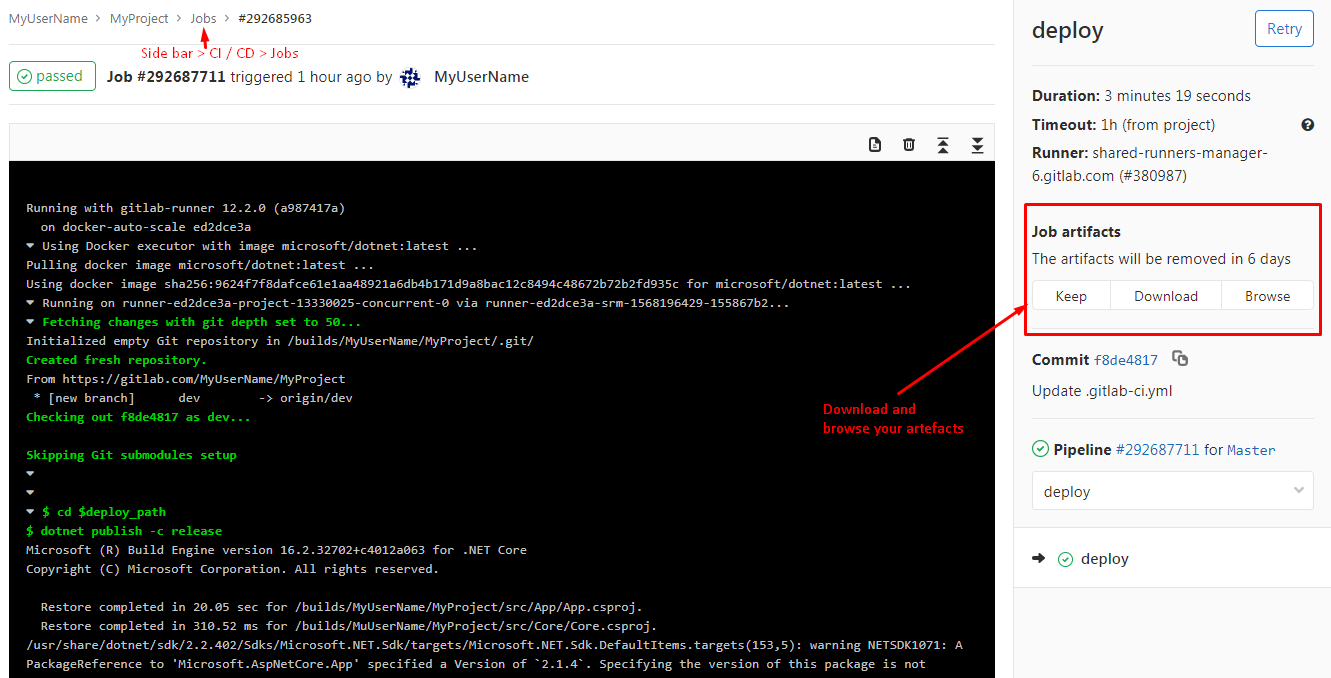
Gitlab also lets you browse artifacts directly in the browser on a job to understand what has been produced. We can also download them.
This is very useful as it means that anyone can go to any merge request, see the pipeline status on the tip of the branch and look at the outputs without them having to checkout the branch, build and run it themselves.
You can define an expiry date for artifacts by using expire_in.
6. Environment variables
You will notice that my lftp commands contains the variables $FTP_HOST, $FTP_USERNAME and $FTP_PASSWORD.
These are environment variables which are secure variables stored out of the repository in the Gitlab UI.
You can set can set these in Gitlab’s UI by heading to your project’s side bar and navigating to Settings > CI/CD, expanding Variables.
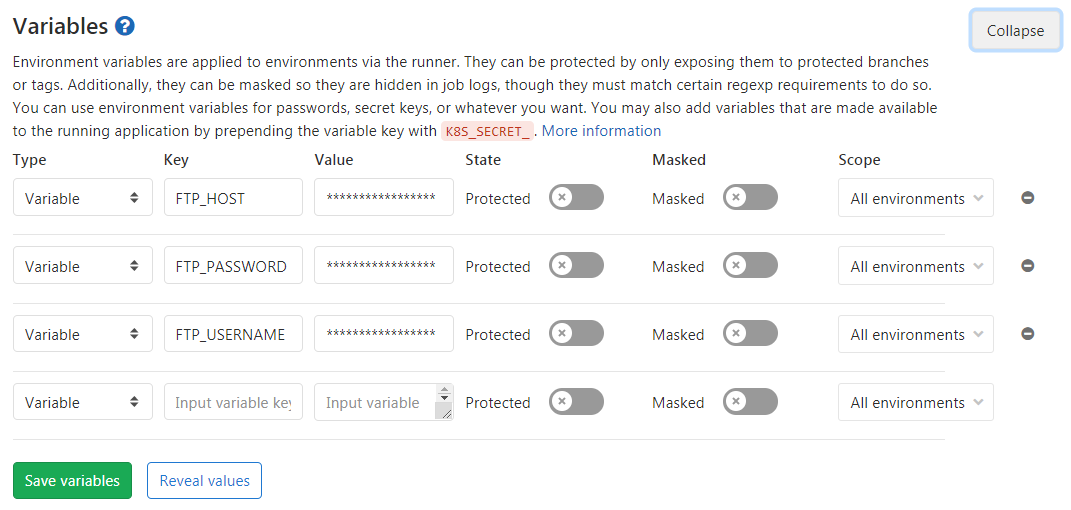
Additionally, they can be “masked” in order to hide them in job logs, although they must match certain regexp requirements to do so.
You can use environment variables for passwords, secret keys, or whatever you want.
Are hidden variables safe?
Hidden environment variables are only as safe as your project. Anyone that can edit and run your CI pipeline could print/echo those variables. If you print them, then they are in the CI logs. So, consider whether you trust your project members you and use with utmost caution if your project is set to Public?
7. Push .gitlab-ci.yml to GitLab
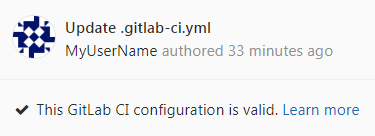
Gitlab will only let you commit your gitlab-ci.yml file if it is correctly constructed. It will warn you beforehand if not!
8. Status of your pipeline
On any push to your repository, GitLab will look for the .gitlab-ci.yml file and start your pipeline.
You can then see the status of your pipeline by heading to settings > CI /CD > Pipelines. You should see the status for each defined stage for the last commit from pending to running, passed or failed.

If you click on a stage icon, you can view the GitLab runner terminal which shows what’s happening during execution. This is helpful as it lets you check what went wrong when your task is failed.
You can also download your artifacts from this page, which is also accessible by clicking “jobs” again in your sidebar.
9. Conclusion
The configuration of each application may take you a while, but once you do, you truly appreciate CI/CD’s immense power - the ability to get new features and bug fixes into production or the hands of users safely and quickly.
Just remember - automation isn’t the goal, it’s the technique to achieve the goal.